Howdy!
I hope all of you had a wonderful New Year's celebration.... are you all keeping up with your resolutions? LOL!
After several week off from scrapping, I got an email telling me about a new challenge... I am currently a member of the Swirlydoos Kit Club, and they started the new year with a fantastic contest... they are calling it the Ultimate Design Challenge, and Wowzers!... great prizes, and lots of inspiration!
Anyway, one of the prizes might be a spot on the Swirlydoos Design Team, so I decided to
enter... of course, the $400.00 prize package doesn't hurt either!
The first challenge was to create a layered embellishment to be used on a layout, card or altered item,
using chipboard or paper as the base, and at least two art mediums such as gesso, paint, inks, crackle
paste, etc. We had a deadline of a little less than a week, and boy!! There were some really beautiful
entries! So inspiring!
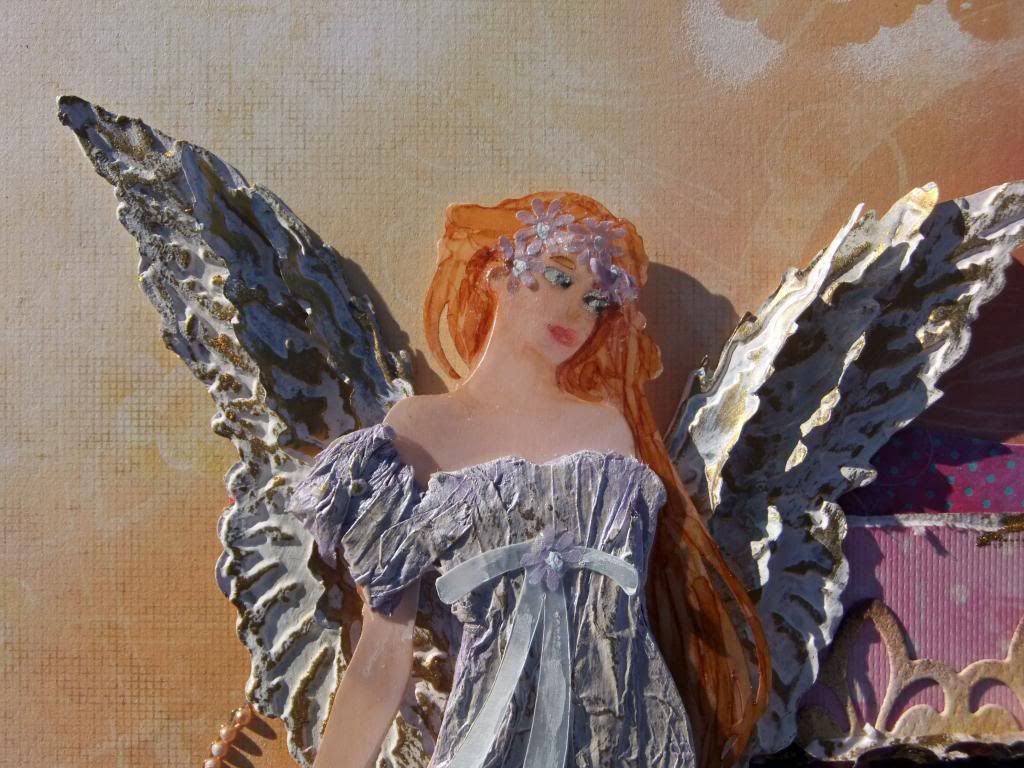
Here is my embellishment:

I used metal and diecut the angel wings with Tim Holtz's layered angel wings die, and embossed them with the matching embossing folder. Then I used gesso (can be found in the paint section of your local art store or Michael's... it is primarily a primer, but has a nice matte look to it...), and gold leaf Rub N' Buff (also sold at Michael's... it's in a little tube where the metal leafing items are... you apply LIGHTLY with a sponge or your finger and rub...), and kept layering the two mediums until I had what I liked. Then I assembled the wings with adhesive, and slightly bent the wings up.

For the angel, I used the Cricut Art Noveau cartridge, and cut the angel out at 6 1/2 inches tall... the body and hair are two layers of peach vellum, and the dress I cut out of Tim Holtz grungeboard... I gesso'd the grungeboard and then I used mod podge decoupage glue to glue on lavender tissue paper,
crinkling it into folds to resemble fabric as I went. When it was dry, I tore the excess edges of the tisuue paper off and I started the layering process again with the gesso and Rub n Buff... if you try this, use a LIGHT hand!! It is easier to add mediums than to take them away!

I layered the body together, and glued them in spots where the dress would cover the glued areas... I did NOT glue the face pieces together, since the glue would show through the vellum.
To make the hair, I carefully drew around the hairline with a Copic marker in a light color, and then colored in the rest of the hair. Then I took a medium and also a darker color and drew in the tendrils... one thing about using alcohol inks on vellum is that you have a longer working time than with regular inks... you can "push" the color around on vellum. When working with these pens, always start with the lighter color, and add the shading progressively, light to dark. I also did some shading to define the jawline and neck with a medium fleshtone color. Be careful to let the inks dry before moving on, or you run the risk of getting the ink on parts of the face where you don't want it! (if this happens, though, you can use a clear blender to get most of it off...)

I drew in the features by hand (the diecut has the eyebrows and eyeholes already cut out, which makes placement so much easier!) Using a bit of gesso and a toothpick, I colored the eyes white, and then added blue and a very small black pupil... since she is facing to the left, I made her iris going that direction... for the mouth, I used a rose colored watercolor pencil, and basically drew a triangle first, with the larger side going off to the left... then I filled it in and drew a top and bottom lip from there... Faces can be very difficult, so if you have never done one before, there are many tutorials on YouTube.com and practice makes perfect!! Don't get discouraged.. just keep practicing! (I have drawn probably hundreds of faces for various crafts, and a lot of doodling!!)
Once you have a face you like, adhere the vellum body to the dress, and punch out some very small vellum flowers... glue those very carefully along the hairline to keep the face piece from popping up, and dot with gesso. Then I used white pearl lumiere on the flowers, and a little on the face for an ethereal look. I also cut the ribbon for the dress from light blue vellum and adhered it to the dress with just one spot of glue under the flower... use another little flower in the center to hide your glue, and dot it with gesso for the flower center. I used pop up dots to adhere the angel to the wings...
Whew!! A lot of work, but a stunning result, I think!
So after all that, I still needed to make a layout, so I chose a picture of a very special little girl....

This is my niece, Emily, that passed away when she was only 4 months old... I never got to meet her, since my husband, son and I were stationed out of state with the military, but she would have been less than a year younger than my son if she had lived. Her mom and dad, my sister and brother in law, have always kept her in their hearts and minds, and made sure their other children remember her. Such a beautiful little girl, and while she is missed greatly on this earth, we know she is safe in God's hands....
For this layout, I used papers from Prima's Firefly collection, flowers from Prima, pearl flourishes from Want2Scrap, and gold doilies and a laser cut wood cross from Michael's that I painted with robin's egg blue acrylic paint and then used Rub n Buff on. I also used the doily as a stencil lightly around the edges of the layout...


I hope you enjoy this layout... while the subject matter could be viewed as sad, I take joy in knowing this sweet baby is safe and loved, and I wanted to make a fitting tribute to her and her family. I used joyful colors in this layout.. I really love it!
I guess I might label this post as a mini tutorial... if any of you happen to use any of these tips to make your own paper piecing, I would love to see it!!
And, by the way, I made it to the second week of the competition... yay!!
Have a great day, and happy scrappin'!
Shelley

